Showing posts with label Activities. Show all posts

Flowers


๐ŸŒผ Spring Blossoms & Little Explorers: Learning Through Flowers in Kanagawa

As winter says goodbye and the air turns soft and warm, something magical happens across Kanagawa—flowers begin to bloom. From the edges of local parks to quiet country paths, nature starts painting with color. And for children, it’s a perfect time to explore, imagine, and learn.

Spring isn’t just a season—it’s a living classroom, and wildflowers are some of the best teachers.


๐ŸŒธ Wild, Not Planted: Respecting Nature’s Garden

Before we dive in, it’s important to teach children this golden rule:
๐Ÿงก Look, smell, admire—and only pick wildflowers.
Planted flowers, like those in public gardens or flower beds, are for everyone to enjoy and are often cared for by someone. But wildflowers, like those growing freely in open fields, ditches, or trails, offer a gentle opportunity for exploration.

Luckily, Kanagawa is full of lovely native wildflowers that are perfect for little nature detectives.


๐ŸŒผ Meet Some Friendly Flowers of Kanagawa

Here are just a few wildflowers you might spot in springtime:

  • Nanohana (่œใฎ่Šฑ / Rapeseed Blossoms) – These cheerful yellow flowers grow in clusters and often bloom in March. You might find whole fields filled with them!


  • Sumire (ใ‚นใƒŸใƒฌ / Violet) – Tiny and often hiding in grass, violets are a favorite to spot. Their purple petals are delicate and fun to sketch.


  • Shirotsumekusa (ใ‚ทใƒญใƒ„ใƒกใ‚ฏใ‚ต / White Clover) – These round white puffball flowers grow low to the ground and often bring bees and butterflies.


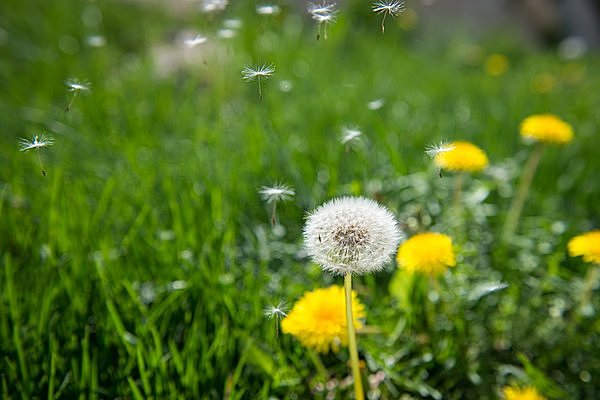
  • Tanpopo (ใ‚ฟใƒณใƒใƒ / Dandelion) – A childhood classic! First bright yellow, then a fluffy white wish-maker.


  • Tsutsuji (ใƒ„ใƒ„ใ‚ธ / Azalea) – Bursting with bright pinks, reds, and purples, Tsutsuji are hard to miss in April and May. While many azaleas are planted in gardens and parks, you can also find wild varieties growing along hillsides and wooded areas in Kanagawa. Their trumpet-shaped petals and bushy leaves make them fun to spot—and they often attract buzzing bees and fluttering butterflies.


๐Ÿงบ Bring a small basket, notebook, and a magnifying glass for your walk—you’ll be amazed at what your child notices.


๐ŸŽจ Learning and Creating with Flowers

Once you’ve explored and admired the blooms, there are so many gentle, creative ways to bring flowers into play and learning:


๐Ÿ–️ 1. Flower Sketching or Painting

Sit in the grass with crayons, markers, or watercolors and invite your child to draw what they see. Talk about the petals, stems, and leaves. Use simple prompts like:
“Is it tall or short?” “What shape are the petals?”

๐Ÿง  What they learn: Observation, color mixing, and nature vocabulary.


๐Ÿ“˜ 2. Make a Wildflower Journal

Press the flowers between paper and heavy books for a few days, then glue them into a small notebook. You can help your child write the name of the flower (in English and Japanese!), where they found it, and how it made them feel.

๐Ÿง  What they learn: Categorizing, writing skills, and mindfulness.


๐ŸŽญ 3. Create Flower People or Pets

With collected petals, leaves, and sticks, help your child design a flower creature—maybe a “petal puppy” or a “leaf dragon.” Use tape or glue on paper and let the imagination bloom.

๐Ÿง  What they learn: Storytelling, spatial skills, and creative design.


๐Ÿ–ผ️ 4. Nature Mandalas

Using rocks, twigs, and flower pieces, show your child how to create a circular pattern (like a flower or sunburst) on the ground. Mandalas are calming and beautiful ways to practice focus and design.

๐Ÿง  What they learn: Patterns, symmetry, and mindfulness.

๐Ÿ”ฌ Flower Science: Color-Changing Petals

One of the favorite springtime experiments at Imagine is watching white flowers slowly change color! This simple, indoor activity teaches children how plants drink water—and brings a sense of wonder as color creeps into the petals over time.

We use both white wildflowers (like clover or daisies, picked responsibly) and store-bought blooms like carnations, daisies, or chrysanthemums. These flowers react well and show the changes clearly.


๐ŸŒˆ What You’ll Need:

  • Fresh white flowers (wild or store-bought)

  • Food coloring

  • Cups or jars

  • Water

  • Scissors (to trim stems)


๐Ÿงช How We Do It at Imagine:

We explore this experiment as a group, filling cups with water and adding food coloring. Some flowers go into single colors, while others have their stems split in half, each side placed in a different color. The split-stem results always surprise the children—it looks like nature’s own magic trick!

Before starting, children draw their predictions by coloring in a flower to show what they think will happen. Will it be red? Purple? Half-and-half? These drawings spark curiosity and discussion.

The flowers stay inside the classroom, and we check them together after lunch and the next morning. Watching the colors climb into the petals is exciting, calming, and truly memorable.


๐Ÿง  What children learn:

  • Capillary action (how plants absorb water)

  • Observation and prediction

  • That science can be colorful and full of surprises!


๐Ÿ’ก Gentle Reminders for Flower Explorers

  • Don’t pick too many flowers—leave enough for the bees and butterflies.

  • Always stay on the path in natural areas.

  • If unsure, help your child gently admire with their eyes or take a photo instead.

  • Bring hand wipes or sanitizer—some plants can be sticky or attract bugs!


๐ŸŒž The Magic of Spring

When children spend time with flowers—touching, naming, drawing, and imagining—they begin to build a lifelong relationship with nature. And in Kanagawa, spring offers endless chances to slow down, look closer, and smile at the little things.

So next time the sun is shining and the breeze smells like blossoms, grab a hat, a basket, and your child’s hand. The wildflowers are waiting.

Frisbee Play

Frisbee's are a timeless classic, whether at the park or on the beach, a Frisbee is always a fun way to pass the time away!

For a child, throwing a Frisbee can be a rewarding experience, as they move from the frustrations of not being able to throw it properly, to the excitement of seeing it fly through the air!

At Imagine, we enjoy playing with soft Frisbees that don't hurt if they hit you, but can still fly well with their padded edges. We recommend the Dodgebee, which comes in different sizes.

Children from around 5 years old begin to possess the motor skills and coordination to be able to throw a Frisbee properly (with a backhand throw). When teaching them, first show the correct grip, with the thumb on top of the Frisbee and the fingers holding the underside.
If using the right hand to throw, bring the Frisbee across to the left side of the chest and bend wrist in. Then swing arm back across to the right side, releasing the Frisbee with a straight wrist towards the target.
With a little practice, your child will soon be able to throw a smooth, and hopefully straight, Frisbee.

Then you can enjoy some games!

Frisbee Games


  • Catch - The most simple game. Just enjoy throwing in a pair or group. For a challenge you can try to reach a target number of successful catches.
  • Frisbee Golf - Set up a target (a hula-hoop works well), and see how many throws it takes to reach or hit the target. 
  • Frisbee tag - This is one of the favorite games of the preschool class (best played in a group of four or more. More players=more fun). Mark out a playing area (we usually do a circle of about 10-15 meters diameter) and choose who will be starting with the Frisbee. The starter must try to hit the other people with the Frisbee (we don't recommend playing this with a hard Frisbee!). If someone gets hit by the Frisbee or runs outside the playing area, they change to the Frisbee team and can work together to try and hit more people. The players in the Frisbee team cannot move when holding the Frisbee so they should work together to pass it to each other. The last person left is the winner!

We hope you can enjoy these Frisbee games together!


Shadow Play

✨ Shadow Play: A Simple Way to Spark Big Imaginations

On a sunny day or with just a flashlight in hand, something magical can happen—shadow play! Shadow play is a great activity that can be adapted to suit the environment or your child's interests! It's one of the simplest and most captivating ways to engage young children in imaginative thinking, storytelling, and even science.

Shadows are more than just dark shapes—they’re invitations to explore, create, and wonder. 

What you'll need: 

  • A light source. Flashlights work well.
  • A plain wall or background (hanging a sheet is always good)
  • Various objects to enhance the play

How to play

Shadow play is a great activity that does not need any rules. Creativity is the key here, so if your child runs out of ideas, try some of these:

๐Ÿ–️ 1. Hand Shadows

Classic and timeless, hand shadow puppets are perfect for quiet indoor play. With a little practice, children can learn to make shapes like birds, dogs, or butterflies. Try shining a flashlight on the wall in a dark room and see what creatures you can bring to life. Even toddlers can wave their hands and notice the shapes they create, sparking early curiosity.

Try this link for some fun ideas.

๐Ÿ’ก Imagination tip: Ask your child, “What sound does your shadow animal make?” or “Where is it going?”


๐ŸŽญ 2. Shadow Theater

Cut out characters from cardboard or use toys behind a light source and a hanging sheet or paper screen. Suddenly, the living room becomes a stage for shadow stories! Children can invent characters, build plots, and even narrate simple adventures.

๐Ÿ’ก Imagination tip: Encourage kids to retell a favorite story—or better yet, invent their own. Add music or sound effects for fun!


๐ŸŒฟ 3. Nature Shadows

Take your child outside and look for shadows cast by trees, leaves, or even their own body. Use chalk to trace the shapes on the ground or have them pose like a superhero and outline their shadow. Come back later to see how the shadow has changed—great for learning about the sun’s movement!

๐Ÿ’ก Imagination tip: Create a “shadow jungle” by tracing leaves and sticks, then draw animals hiding in the shadows.


๐ŸŽจ 4. Shadow Drawing

Set up a table near a window, place toys or blocks on a sheet of paper, and let the sun do the rest! Children can trace the shadows and then color them in to make silly or surreal art pieces. Try it with action figures, dolls, or LEGO characters for added fun.

๐Ÿ’ก Imagination tip: Ask questions like, “Why is the giraffe’s neck so long in the shadow?” or “Can you turn this shadow into a robot?”


๐Ÿ”ฆ 5. Flashlight Fun

Dim the lights and hand your child a flashlight. Let them explore how moving the light changes the size and shape of shadows. Hide small objects behind the light and let them guess what’s making the shadow—a mini version of "What's in the Bag?"

๐Ÿ’ก Imagination tip: Create a bedtime “shadow adventure” by making shadows dance on the ceiling while telling a story.


Why It Matters

Shadow play encourages:

  • Imaginative thinking

  • Fine motor skills

  • Early storytelling

  • Understanding of light and space

Plus, it’s screen-free, low-cost, and incredibly engaging. Whether indoors or out, with hands or household objects, shadow play invites children to create their own worlds—one shape at a time.


So next time you see the sun casting long afternoon shadows or you’re stuck indoors with a flashlight, give shadow play a try. The only limit is your child’s imagination!